Step 1
First you need to Create an Armature for Your spider, I have used Aluminium Wire for the main structure of the Armature and then wrapped it in a very fine gauge soft jewellery wire. I used the fined wrapping of wire to add extra texture for the Polymer Clay to grip to. I have Bulked out the body section to cement the legs in position with some Scrap Clay which I then baked.
Armature wire I used in this project.


Step 2
I have then bulked out the main body and Legs of the spider using a mixture of Super Sculpey and Sculpey Firm I conditioned this using a Pasta machine it can be done by hand but is really time consuming and your hand get sore after a while.

Products I used in this step


Step 3
My next step was to start adding detail around the point where the legs meet the body. I created this effect by rolling very thin snakes and then moulding them around the base of the legs with a very fine ball stylus tool. I have also bulked out the main body a bit more.

Step 4
In the last photo you can see where I started to create the joints on one of the legs, in the next I have continued making the rest of the joints on the legs. These I have made using a thin plastic knife which I have used to make an incision on an extreme angle to create the effect that the next section of leg is coming out of a socket.

Step 5
Next I added Feelers and Fangs, which I have strengthened with inner wire as well.

Step 6
The next step for me was to Bulk out the Main body or head which I then smoothed into the pre existing clay using a ball stylus tool. I also added an extra set of horizontal fangs for effect.

Now I have started to add eyes by creating eye sockets using a ball stylus, then I have simply added simple balls of clay which i gently inserted into the sockets.

Step 8
Then I painstakingly used a pin to create the Hair effect over the entire surface of the Spider, keeping the texture always going in the same direction to keep the look of hair.

Step 9
After baking it was time for painting which I used Water based acrylic paints and a paintbrush (obviously). I then used some High gloss glaze to make the eyes glint.


Products I used in this step.


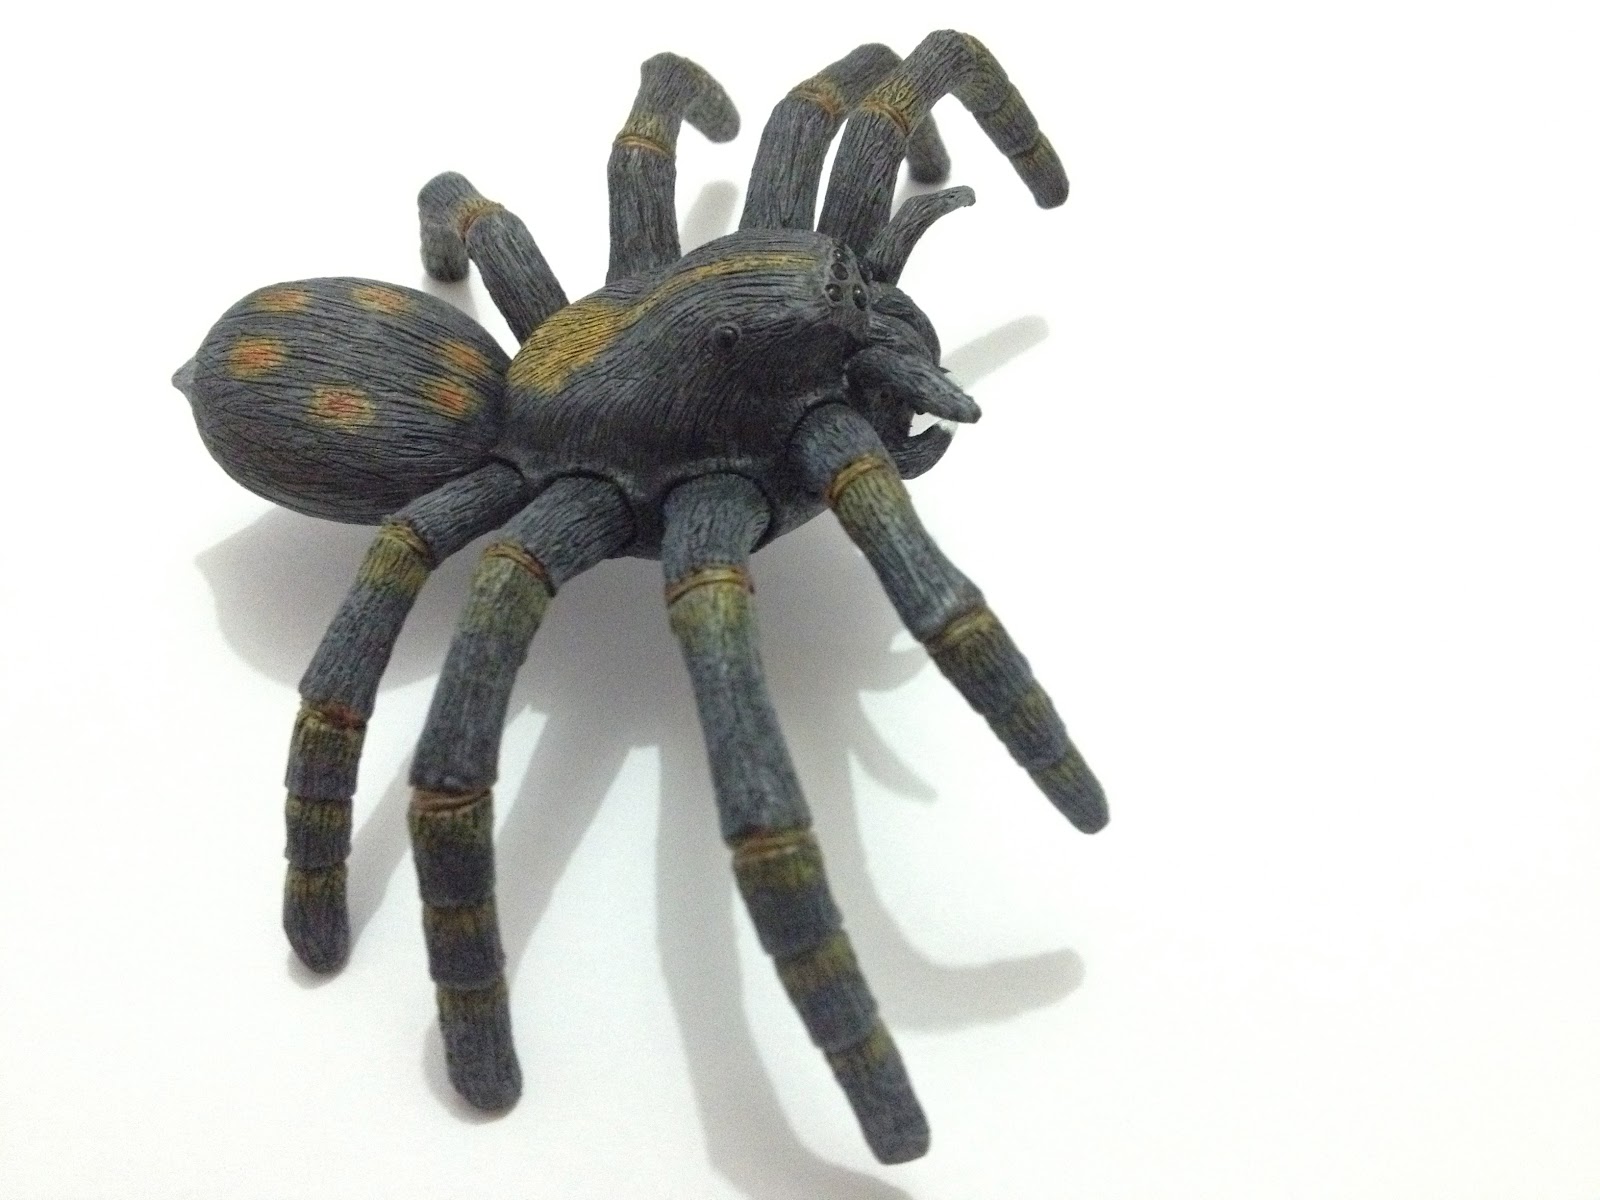
Anyway this is the way my Polymer Clay Spider has finished. I hope you can all take something out of this quick tutorial. If you have any questions at all feel free to ask away.
Tools used in the Making of this Polymer Clay spider


If you are looking for any of these products you can click on the image or I have made a list of links of all tools and products used in this project.
Set of Thin Plastic Clay Modeling Tools
Sculpey Super Sculpturing Compound 1 lb. box, Beige
Super Sculpey FIRM Gray- One Pound
Sculpting Tools
1/16 Inch X 32 Foot Aluminum Armature Wire
Studio By Sculpey Style & Detail Tools Set Of Three
Matisse Structure Sampler Set of 12 12 ml Tubes
I look forward to hearing about your experiences making a Polymer Clay Spider of your own.
Post a comment and Link to a photo of your spider when your done.
You can also see my photos in sequence with this short video that has a quick commentary on a few of the main things I did to create this spider.
Fantastic !!! I love it !!!
ReplyDeleteThanks a lot Gothic Toyland, Much appreciated.
DeleteNot a fan of spiders, and I don't do much art... but this caught my attention!
ReplyDelete